Virtualmin is a webhosting cpanel used for hosting websites, web applications, databases and mail boxes. It comes with two packages, Webmin and Virtualmin. Webmin is a frontend server management tool that can be used by administrators to manage and monitor their systems with simple point and click. On the other hand, Virtualmin is an advanced front end virtualhost management tool that can be used to create, modify and manage virtualhosts.
Virtualmin is a flexible tool with plenty of domain management utilities used by the hosting providers and the owners of the domains. It contains addons like antivirus and spam filtering mechanism. It also provides a dashboard for monitoring of user resource utilization and analytics features.
Step 1: Update CentOS / RHEL system
Make sure you are running on an updated system with all the packages up to date.
Yum update
change hostname
sudo hostnamectl set-hostname <your-hostname>
e.g
sudo hostnamectl set-hostname webhost.itcertified.pro
Step 2: Download Virtualmin install script
Download the script that will be used to install Virtualmin.
sudo dnf -y install wget
wget http://software.virtualmin.com/gpl/scripts/install.sh
The script will be downloaded to your current working directory.
Step 3: Make the script executable and Install Virtualmin
Make the script executable by running the command below.
chmod a+x install.shNow execute the script with sudo permissions:
sudo ./install.shThis will launch downloading of the necessary packages and installation of the application.
Welcome to the Virtualmin GPL installer, version 6.2.0

  This script must be run on a freshly installed supported OS. It does not
  perform updates or upgrades (use your system package manager) or license
  changes (use the "virtualmin change-license" command).

....
The time it takes to install depends on the speed of your internet but it averagely should take between 10 to 15 minutes.
The installation should complete and exit shell with the message indicating that the installation was successful.
[SUCCESS] Installation Complete!
[SUCCESS] If there were no errors above, Virtualmin should be ready
[SUCCESS] to configure at https://hosting.computingforgeeks.com:10000 (or https://18.35.136.78:10000).
The message also indicates that the service is running and can be accessible via the IP or the hostname, if it is resolvable through the internet.
Step 4: Configure Firewall for Virtualmin on CentOS | RHEL 8
You will be required to open port 10000, which we shall use to access Virtualmin web interface.
sudo firewall-cmd --zone=public --add-port=10000/tcp --permanent
sudo firewall-cmd --reload
Step 5: Configure Virtualmin on CentOS | RHEL 8
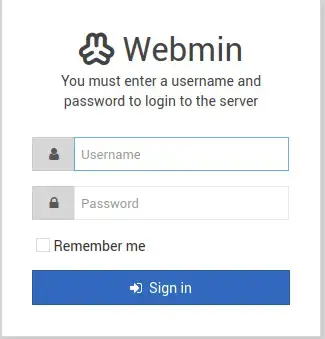
You have now successfully installed Virtualmin and It can now be accessible via the browser using the IP/hostname and port 10000.
On your browser, navigate to https://<hostname>:10000 e.g https://hosting.computingforgeeks.com:10000
Provide the username as root and the password is your root user password for the host.

Upon successful login, you will be presented with a post installation wizard that is used to configure and optimize the system for production.
Click ‘Next’ to start the configuration.

Allow Virtualmin libraries to be preloaded to reduce issues with slow UI and navigation.

You can also enable ClamAV Virus scanning. This however calls for installation of other utilities to support the setup. We wont be using ClamAV in our setup.

It is always best practice to have a system that will be on lookup for spamming activities if you will be hosting many email domains. SpamAssasin comes in as a great tool for this when using Virtualmin.

You will also be required to choose which database you want to use in your hosting environment. We shall be using MariaDB in this setup.

Set the DB password:

Choose the size of your database depending on the size of your server. Memory is the biggest factor to consider at this point. But you should also bare in mind that the smaller the DB the less the capacity it will be able to handle.

Set up the DNS servers that will be used in our hosting environment.

Complete the steps and click ‘Finish’. You should now be able to use your hosting platform.
You can access the dashboard where there are different tools that you can use to manage your hosting platform.

Create a Domain on Virtualmin
After a successful installation and configuration of Virtualmin, the next step is to try setup a domain to test if our hosting platform is ready.
In Virtualmin, domains are termed as Virtual Servers
On the dashboard, click on ‘Create Virtual Server’. You will then be required to provide the domain name and the administrative password.
You can also create a subdomain from the same interface.To do so, use the ‘Alias of <hostname>‘ tab.

Then finally click the Create Server button.
This will create an account with the domain name you have created and can now be used as a webserver. Ideally, this creates a virtualhost in the background and assigns its own directory and database.
You can navigate the filesystem of the newly created domain by clicking in the File Manager tab on the left. This presents a filesystem just like cPanel, where your index files should be placed in the Public_html directory.

In the ‘Services’ tab, you can configure your website, with a range of options, including file indexing, permissions management, php version editing, etc.

You can also preview your website from the Services menu.


Recent Comments